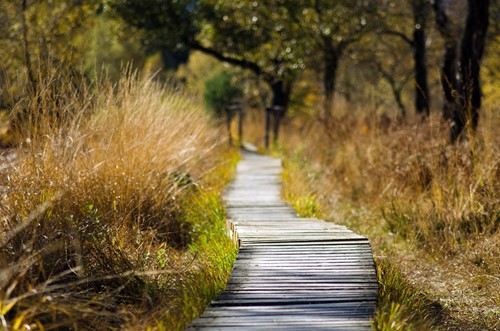
Wooden pallets are a budget-friendly source of reclaimed wood and can inspire countless DIY projects. For those who love casual and rustic garden pathways, a pallet might be the perfect place to start. Using just a few materials and tools you can create a wooden plank path for your outdoor space without breaking your budget. Here we’ll go over the basics for making your own pallet garden walkway.
What You’ll Need
1 or more wooden pallets’ worth of wood — number will depend on path length
Garden rake
Garden topsoil or potting mix
Garden trowel
Tape measure
Screed
Circular saw
Wheelbarrow
Process
First, you’ll need to prepare the area for your new path. Clear away any debris and plant life that might be in the way. If you’re pulling up shrubs or other plants, do so from the roots. This will prevent unexpected growth damaging your pathway in the future. If you’re constructing a path through sod, you may need additional tools to cut through it.
Create a clean garden edge if desired. Otherwise, you can leave the edges natural for a more rustic or cottage style.
Using a rake and shovel, add new garden topsoil as a base for your pathway. This layer does not need to be thick, but just enough to provide some cushion for the wood planks.
Level the pathway using a screed or other leveling tool. If your path connects to a driveway, sidewalk or other paved surface, make sure the surface of the path soil is slightly lower to prevent tripping hazards.
Using your tape measure, determine the total length of your path. Then, measure your wood pieces to figure out how many you need. You’ll avoid frustration or waste if you know the exact number of planks you need beforehand. If your walkway has any curves, cut extra pieces to fill in gaps.
Cut the wood to the width of your path. Always wear protective equipment when using a saw.
Starting at one end, place each wooden plank into the path. Adjust as necessary to create even gaps between them.
Once you finish laying out the path, fill in the gaps with extra soil to secure the wood in place.
Test out the pathway to make sure none of the planks rock or tip. If you find any that are sitting loose, adjust by packing in more soil.
Decorate and finish with edging materials like rocks or even create an edge out of leftover wood.
Now you have a simple and functional garden pathway made entirely out of reclaimed materials. One notable advantage of this type of pathway is that the wood is unattached and mobile. If you need to weed or add new soil, you can simply remove the boards until you’re finished. For an extra secure pathway, try planting ground cover like moss around the edges. This will creep in between the boards and create a lush, charming aesthetic perfect for a rustic or cottage style garden.
About the Author

Leona "Kay" Lehmer
I have been in the real estate industry for over 25 years! I started working with some of the top builders in Tampa and then decided to pursue my general real estate license. I love working with people and helping them find the home of their dreams. The TampaBay Metro area(Tampa, St Petersburg, Clearwater...)is a great City and has grown unbelievably in the past 25+years. I have extensive knowledge that I can share for those coming to the Florida area or those who want to move up or downsize or have to leave our great state. I make it my goal to work for you to find the right home, whether it be upsizing or downsizing, I will find the best location for you! From the beaches to golf course to the city or country, I can find the perfect home for you! When you call my phone, you get ME! You are not handed off, if I don't know the answer to a question, I will find out and get back to you! I Work FOR YOU!!
